
A flawless user interface serves as your brand's ambassador, leaving an impression with every user interaction.
About 94% of people form an initial impression about your website based on its design, and 75% of users trust a visually appealing website.
Imagine your application's UI not looking great on every device and leaving a bad impression on visitors.
Screenshot testing can help you solve this problem by providing a uniform appearance on all platforms.
This guide will help you learn the essentials of automating screenshot testing and how it works to create a UI design that impresses every user.
Let's get started.
What is Screenshot Testing?
Screenshot testing is a technique for capturing images of a web page or an application under test and comparing them to a reference (baseline) image.
It is a simple and easy way to verify that your application works as intended by identifying visual differences and inconsistencies across different platforms.
Inconsistent visual appearance can be a major problem as it directly impacts user experience and satisfaction.
You can make your website or application meet design specifications and user expectations by performing screenshot tests.
Components of a Screenshot Test
Screenshot testing involves the following key components:
- Baseline Image: The reference image used for comparison is taken when everything looks perfect in your app.
- Captured Screenshots: Images that show how your app or website looks after changes.
- Highlighted differences: Any visual differences between baseline and new screenshots.
For example:
Imagine you are building an app and want it to look the same for everyone, no matter the device or browser they are using.
With screenshot testing, you can take snaps of your app to see if everything still looks perfect after performing an action.
These captured images are then compared to a baseline image.
If there are any differences, such as a misplaced button or a color change, it will be highlighted.
This helps you spot problems early so that you can fix them before your users notice.
How to Perform Screenshot Testing?
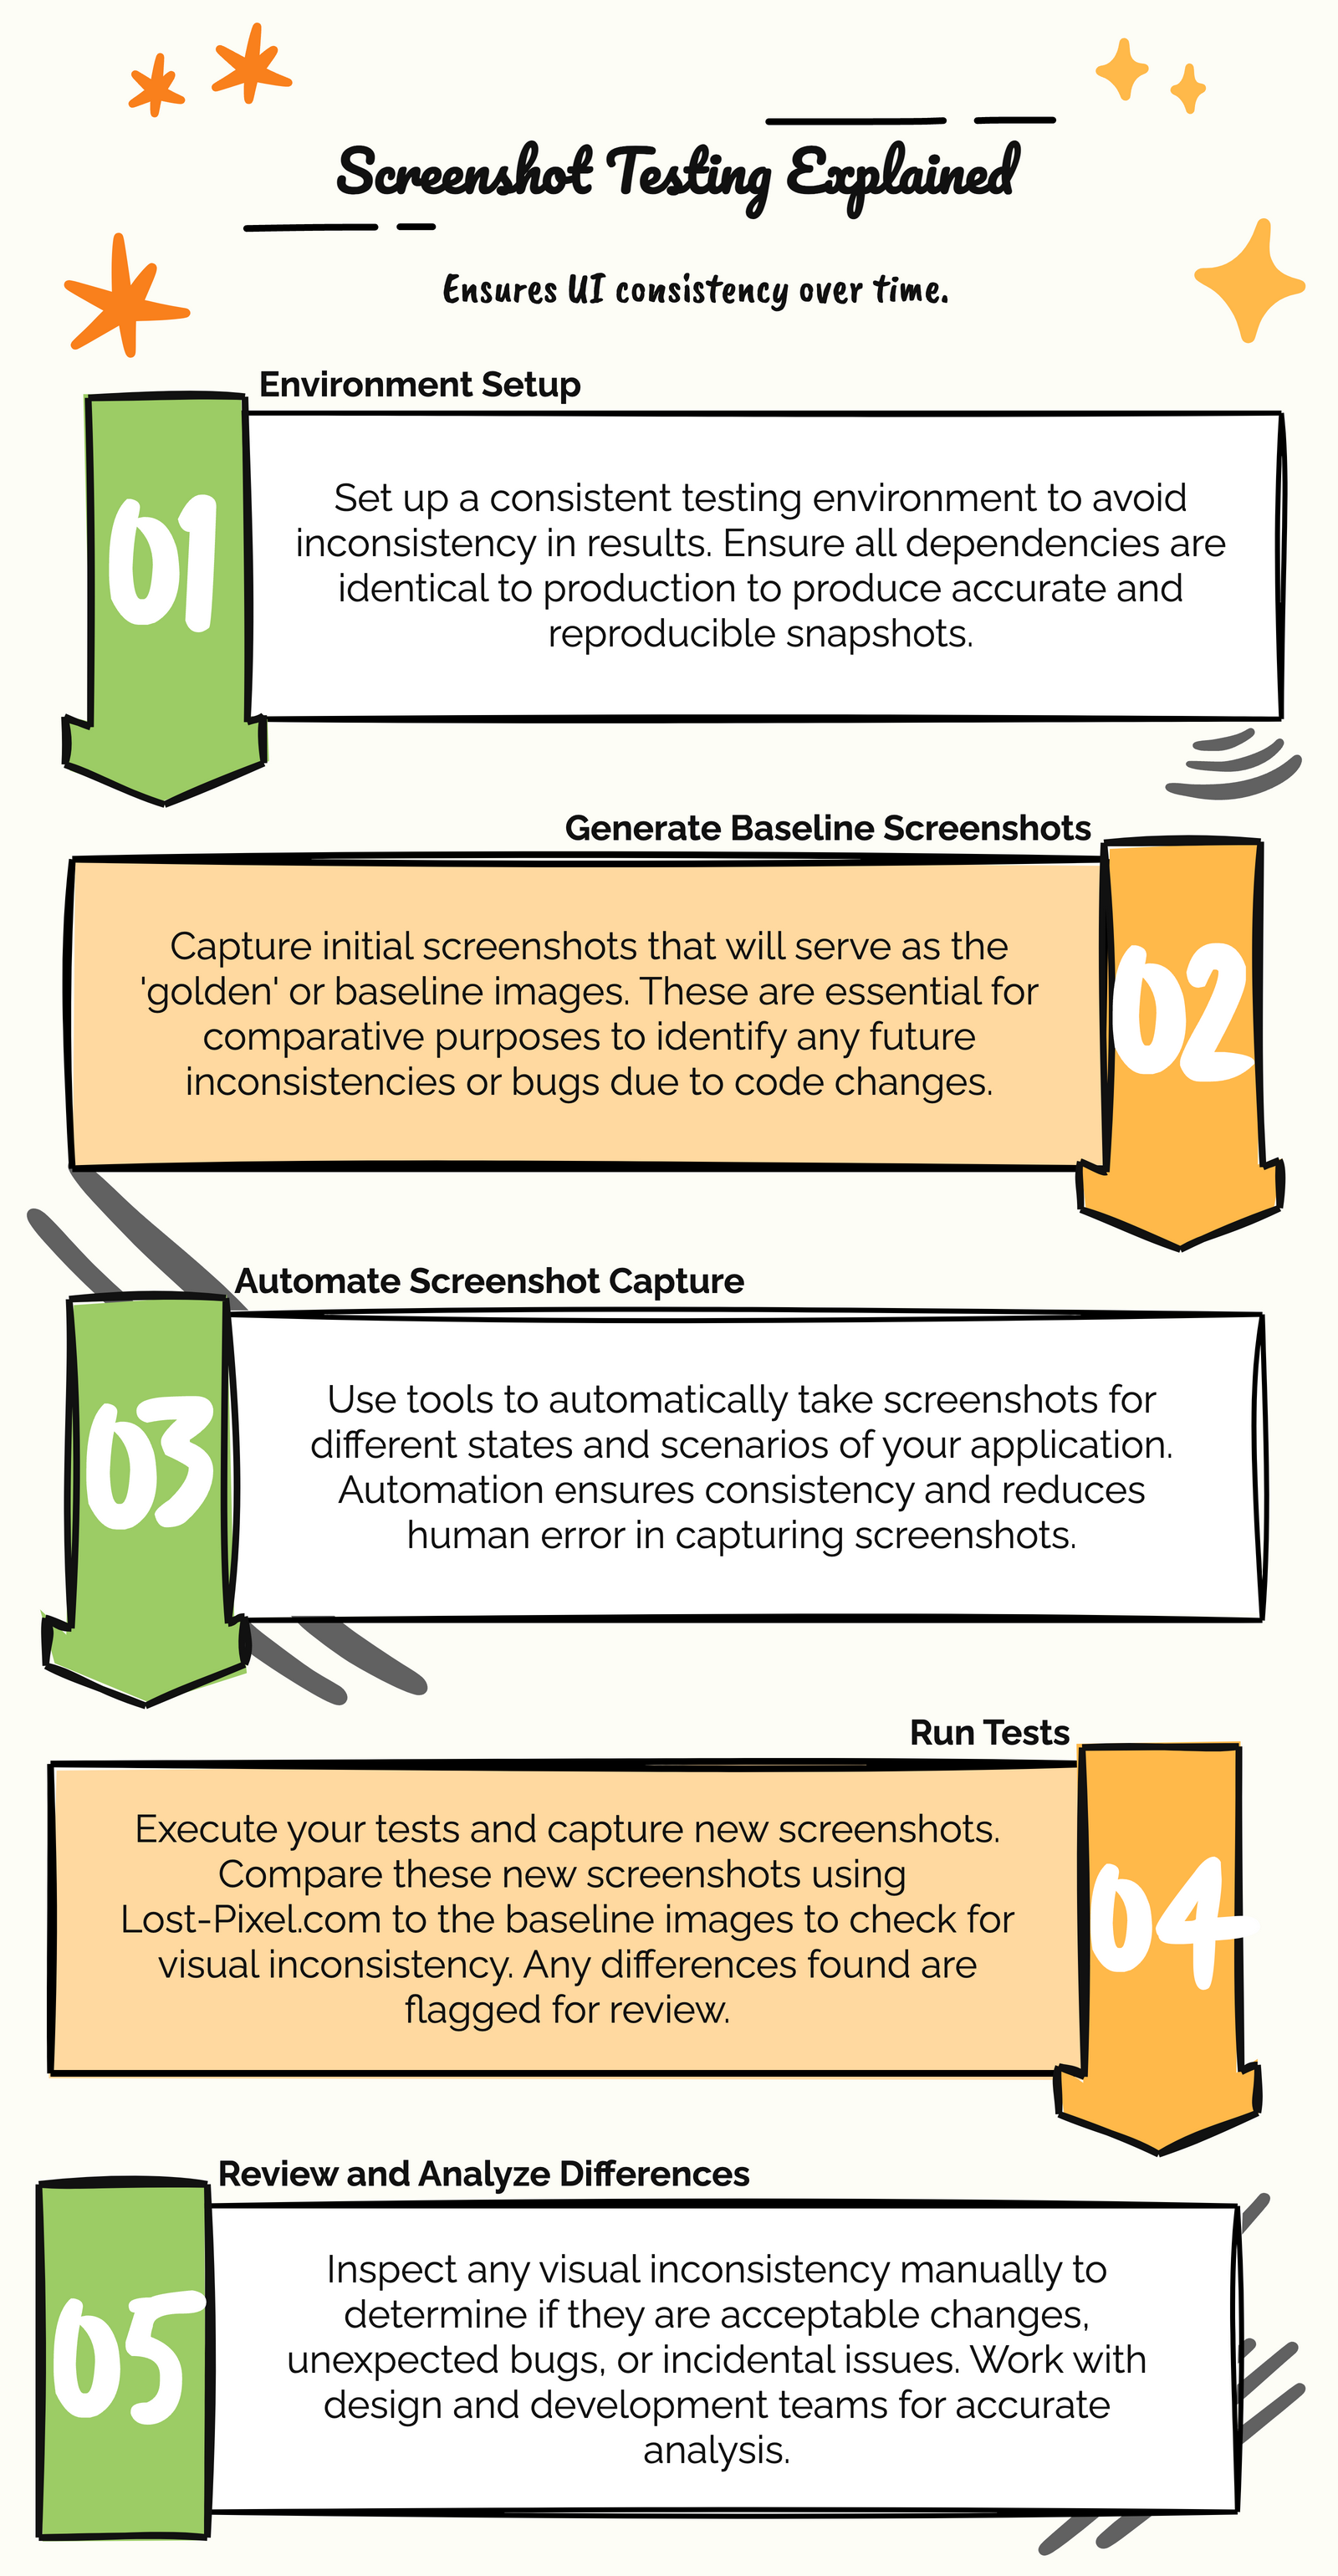
You can perform screenshot tests to ensure your user interface doesn't break and your website renders correctly across various browsers, screen sizes, and operating systems.
Select a Screenshot Testing Tool
The first step is choosing a screenshot testing tool that best fits your requirements.
Determine what you need to test, web or mobile applications, and the browsers and devices you want to test on (e.g., Chrome, Firefox, Safari, iOS, Android).
Consider the following selection criteria:
- Look for a tool that is easy to use and set up.
- It should support automation testing and integrate with your CI/CD pipeline.
- Evaluate key features, performance, and speed.
- It should support your application's tech stack and the programming languages you use.
- Check if it offers community support and documentation.
- Choose the tool that provides the most value for money.
Set up visual regression tests in minutes with Lost Pixel Platform. Do not let your users find bugs first.
Identify Test Cases
The next step is to identify which application components need to be tested.
Once you have defined your test scenario, you can write a test case to perform automated visual testing.
Here are some examples of test cases for screenshot testing:
- Check that all the buttons, links, and navigation function correctly.
- Verify that the login page appears the same across different devices and browsers.
- Test that visual elements like text, icons, and images are correctly positioned and displayed.
- Confirm that the layout is responsive across different screen sizes.
Tip:
You can create a UI testing checklist to ensure you don't miss any critical parts during testing.
Create Baseline Images
After choosing the important screens and states of the app you want to test, you need to take a screenshot using your testing tool.
You can take screenshots manually or automatically when everything looks perfect.
This is the reference screenshot, which will serve as your baseline image.
Write Test Scripts
After creating baseline images, you need to create test scripts using your automation tool's scripting language.
Test scripts are instructions that tell the tool what actions or steps to perform.
For example, you can include steps to take screenshots at key points where you want to check for visual differences, such as clicking buttons or navigating to the homepage.
Once you have created your test scripts, your automation tool will run them and take new screenshots at each step.
Compare Screenshots
After capturing the new screenshots of your application, you can compare them with the baseline image.
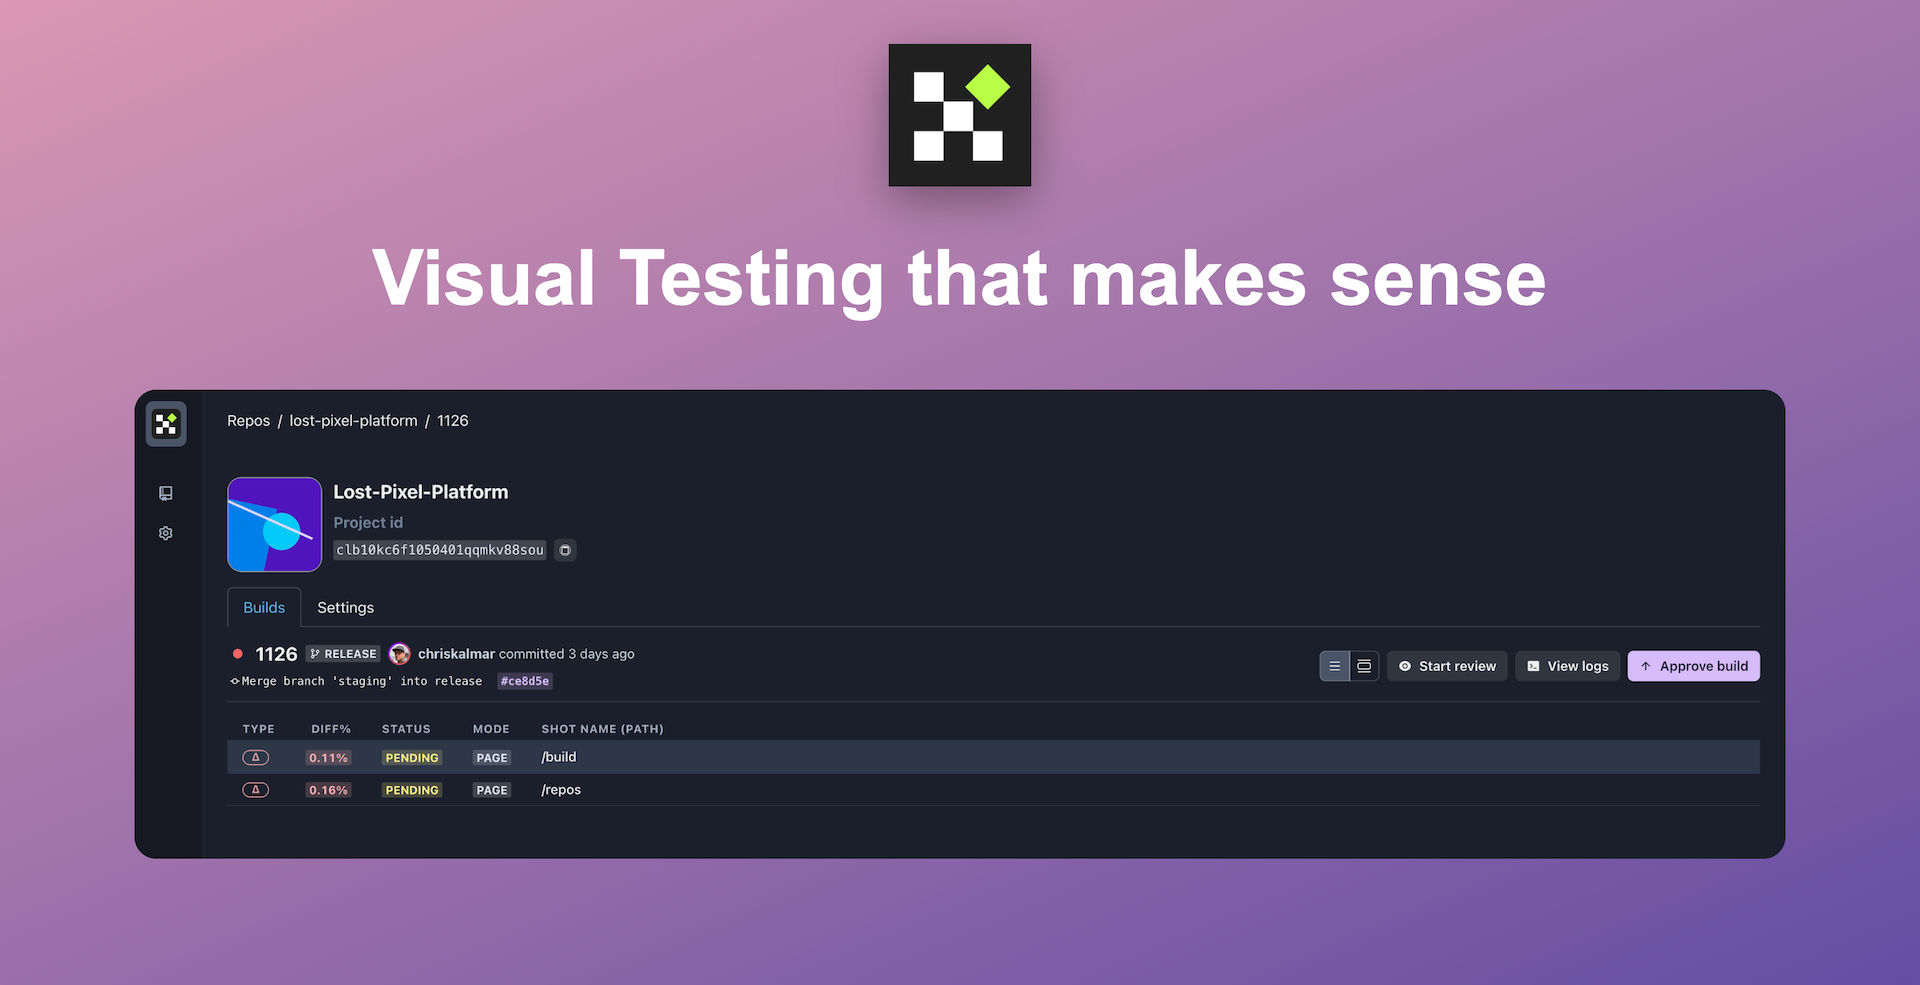
You can use automated tools like Lost Pixel to make this process easier and automatically compare the new screenshots with previous ones.
Doing this lets you validate that the UI is consistent and looks as expected.
This will help you identify any visual inconsistencies or bugs that may have been introduced after code changes or updates.
If both screenshots match, the test is completed; however, if the current state does not match the previous screenshot, the test fails.
Set up visual regression tests in minutes with Lost Pixel Platform. Do not let your users find bugs first.
Here's a summary of the comparison results:
- No difference: the tests pass as expected.
- Expected difference: The test fails, but the change is expected. In this case, you must update the baseline images, resulting in a no-difference result when the test is rerun.
- Unexpected difference: The test fails, and the change was not intended. Screenshot testing can help you catch these changes easily.
Analyze Results
The next step is to review and address any issues found carefully.
- Analyze the comparison results to see where things don't match up.
- If you find issues that are unintended or not a planned update, make necessary changes to your code to fix them.
- It is recommended that the tests be run again to double-check that issues are resolved and no new bugs have been introduced.
Update Screenshots
If you've made intentional changes to your app's design, you will need to update your baseline screenshots to capture the new look.
It is a good practice to run these tests regularly, especially after making updates or changes to your app, to maintain consistency in UI design.
With the help of automated tools like Lost Pixel, you can schedule and run tests automatically to catch any new visual issues early.
Tools for Screenshot Testing
Now that you know the basics of screenshot testing, it's time to check out the best automation testing tools you can use to help you through the process.
Lost Pixel
Lost Pixel is an open-source automated visual regression testing tool that can test UI components in minutes and help you confidently ship front-end changes.
It allows for pixel-by-pixel comparisons of screenshots of web pages across multiple breakpoints and viewport sizes to help you catch the maximum regressions.
You can perform holistic visual tests using your existing Storybook, Next.js, Playwright, and GitHub Actions, including:
- Visual unit tests to verify individual components.
- Integration tests for full-page screenshot testing.
- End-to-end visual tests.
- Cross-browser testing (Chrome, Mozilla, Safari).
- Responsive design testing.
Set up visual regression tests in minutes with Lost Pixel Platform. Do not let your users find bugs first.
BackstopJS
BackstopJS is an open-source tool that performs automated visual regression testing for web applications.
It allows developers and QA testers to perform scenario-based testing by simulating real user interactions.
Aye Spy
Aye Spy is an open-source tool that catches UI regressions by comparing up to 40 screenshots in a minute.
It runs on Selenium Grid, which allows for parallel execution and multiple browser screenshot testing.
Kobiton
Kobiton is a cloud-based visual testing platform for mobile testing. It captures visual differences using real devices (iOS and Android).
Some other visual and snapshot testing tools you can explore:
- Cypress
- Playwright
- Screener
- Puppeteer
- Jest
- Compose for Android screenshot testing.
Best Practices for Screenshot Testing
- Always use clear, high-resolution baseline images for accurate results.
- Use a consistent naming convention for screenshots for easy management.
- Include testing in your CI/CD pipeline for continuous monitoring at every code change.
- Set tolerances for minor differences to avoid false positives.
- Make sure your test environment is stable to reduce flaky tests and maintenance time.
Final Words
Screenshot testing is invaluable for maintaining a consistent and professional UI across all devices and browsers.
By automating this process, you can save time and focus on providing the best possible user experience.
FAQs
Can I change my preferences for screenshot testing?
Yes, with a tool like Lost Pixel, you can set your preferences such as:
- Mask or hide the elements you don't want to test.
- Set sensitivity thresholds (absolute, relative, per screenshot, or global).
- Approve, reject, or comment on screenshots.
- Use custom wait times and networks.
How can I download all the screenshots generated during automated testing?
Most screenshot testing tools allow you to download all the screenshots taken during the testing process to review and analyze them as needed.

About Dima Ivashchuk
Hey, I'm - Dima the co-founder of Lost Pixel. I like modern frontends, building stuff on the internet, and educating others. I am committed to building the best open-source visual regression testing platform!