
Why you might need visual tests in monorepo 📦
Monorepos have become increasingly popular in software development due to their ability to centralize and streamline code management. Ensuring consistency and preventing visual regressions becomes crucial with multiple interconnected components or applications in a single repository. Here are a few reasons why visual regression testing is essential in monorepos:
-
Multiple Frontends: In a monorepo with several front-end applications, visual regression testing can help detect unintended design changes and ensure a consistent user experience across all frontends.
-
Design Systems: Monorepos often include design systems that provide reusable UI components for multiple applications. Visual regression testing ensures that updates to the design system do not cause unexpected visual discrepancies in the consuming applications.
-
Component Libraries: Monorepos may contain component libraries shared by different projects. Visual regression testing guarantees that changes to these shared components do not introduce visual bugs in the dependent projects.
-
Collaboration: As monorepos facilitate collaboration among multiple teams working on different parts of the project, visual regression testing helps maintain design consistency and prevents visual issues introduced by cross-team contributions.
In summary, visual regression testing is critical in maintaining the integrity of a monorepo's design and user experience. By incorporating it into your development workflow, you can minimize visual inconsistencies and improve the overall quality of your projects.
Our end goal is to have a continuous integration flow with GitHub actions that notifies us whenever there is a visual regression in our monorepo
Let's learn how you can add visual tests to your monorepo with Turbo & Lost Pixel.
The finalized code is accessible: here
What is Turborepo 🖼️
Turborepo is a high-performance monorepo build system that aims to optimize and simplify the management of codebases. By enabling efficient caching, parallelization, and incremental building, it provides a robust solution for developers to maintain and scale their projects seamlessly. In this blog post, we will explore why there is a need for Visual Regression Testing in monorepos & how we can easily add them using the Lost Pixel Platform.
What is Lost Pixel Platform 🔎
Lost Pixel Platform is a cloud-based visual regression testing platform that enables developers to test and validate the visual appearance of web pages and applications. It automates the testing process, helping to ensure that the visual integrity of the application is maintained. The platform captures screenshots of web pages and compares them to previous versions, allowing developers to identify and fix visual bugs quickly. It offers straight integration with GitHub & allows for easy collaboration between team members.
Lost Pixel is free for open source & offers a generous free plan for small projects!
Setup ⚙️
Turborepo
We will be using the basic Turborepo example - it contains two Next.js web apps that we will use to demonstrate the Visual Regression Testing workflow.
Pull the repo and copy the contents of the basic into a separate repo, we will be using GitHub actions so you will need to create a repo on GitHub as well to follow this tutorial in the best way! Your repo contents should look similar to this:
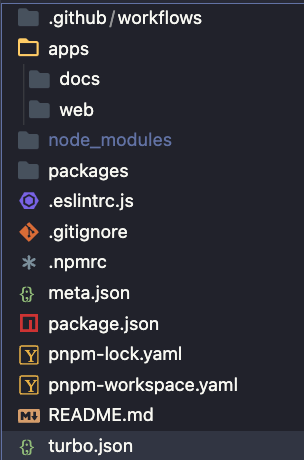
Running pnpm run dev at the root of monorepo should launch two browser windows with the simple demo apps!
Lost Pixel Platform
Follow the documentation of Lost Pixel to install the app on your GitHub repository.
❗Note: when you enable the monorepo mode, which we are going through in this section you will have 2 distinct project IDs that we will use in the last integration step.
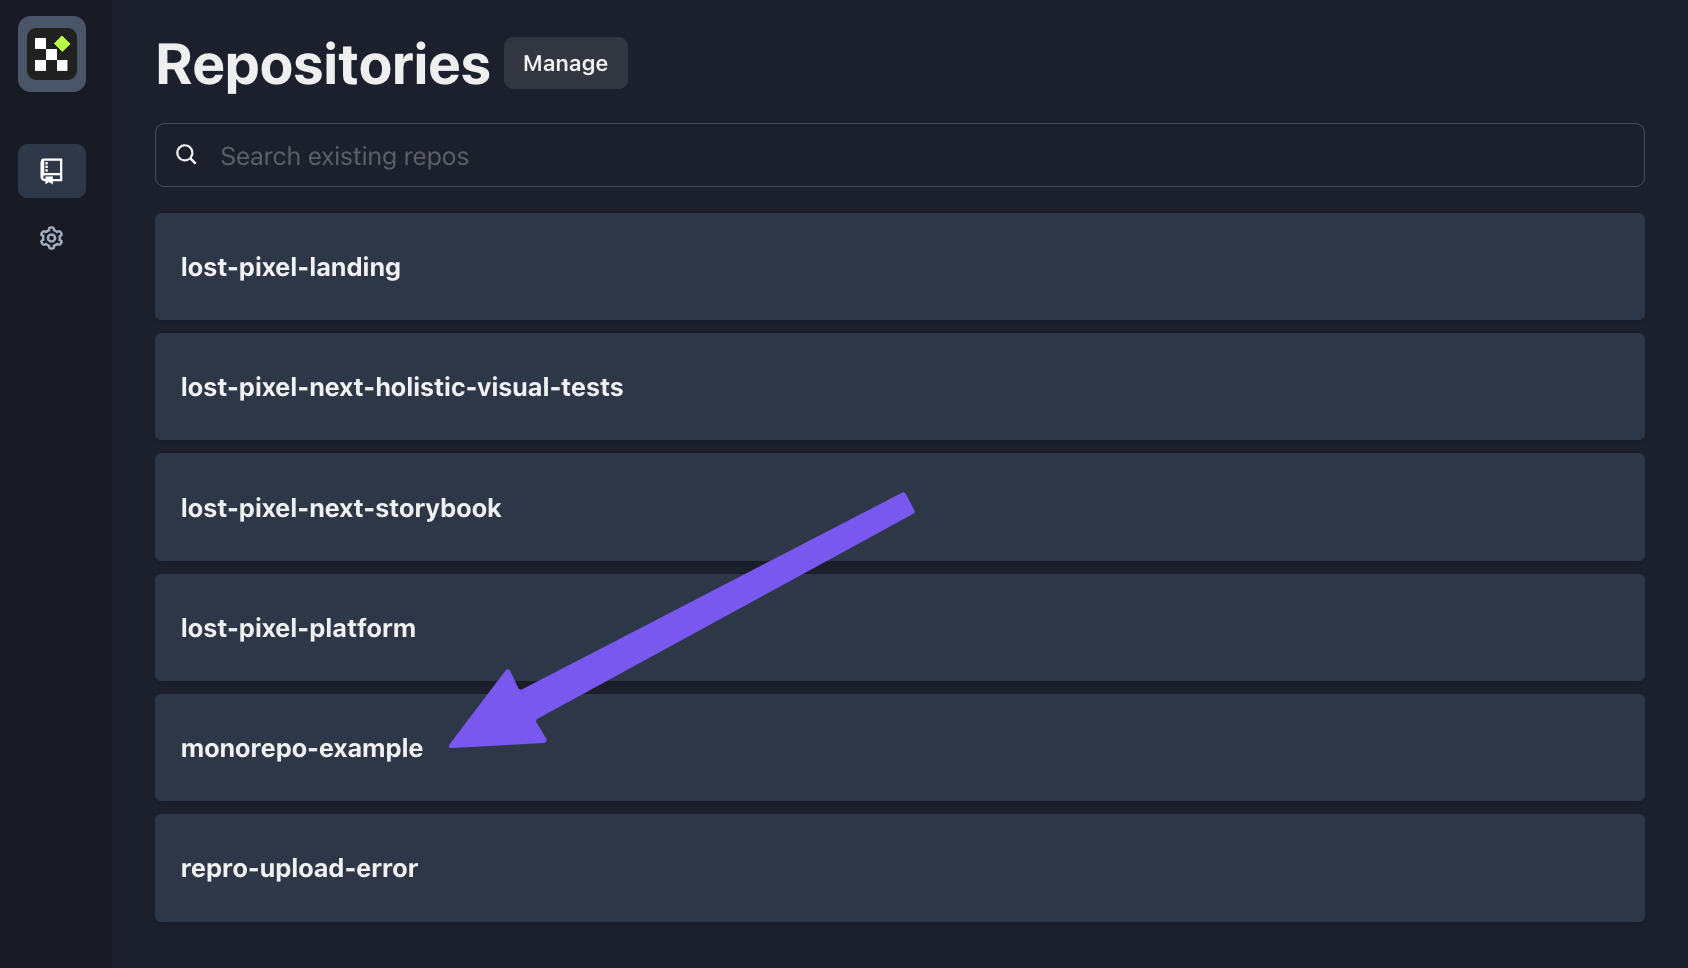
After following a simple setup on GitHub & Lost Pixel Platform you should see your repo in the repositories list.
In the repository view, you now need to switch to monorepo mode, and then you can rename your project to something more convenient:
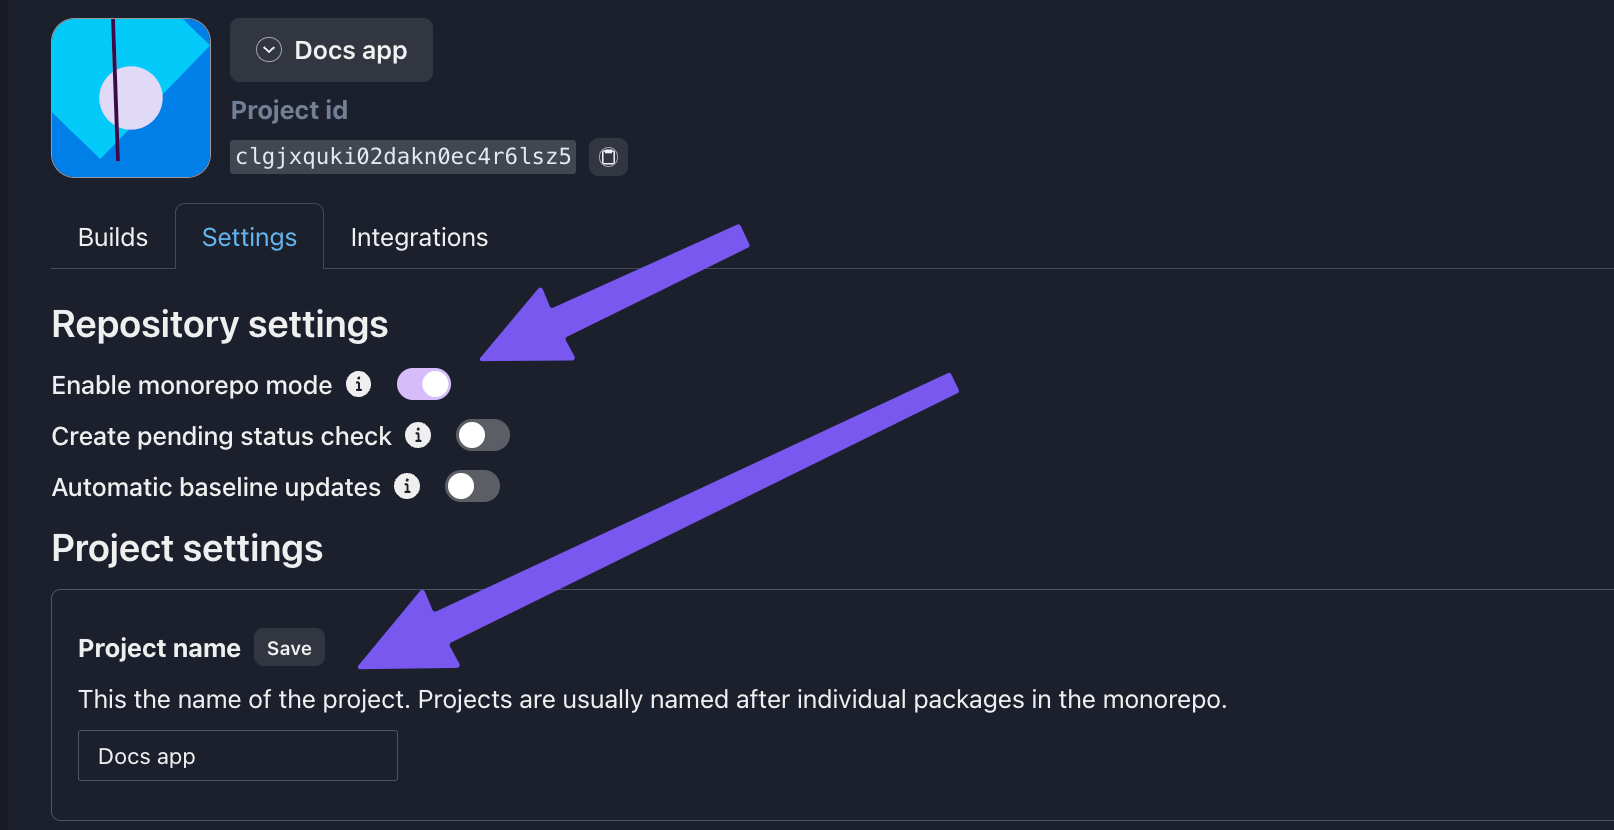
Finally, create a new project inside of this repository:
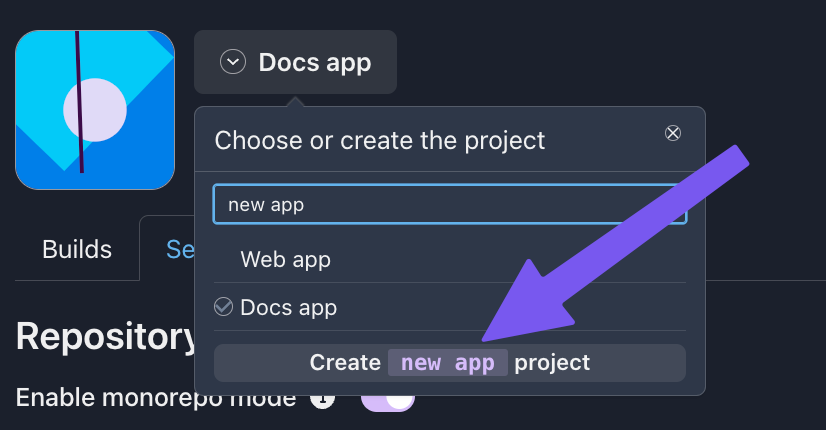
You can now easily switch between the projects using the project dropdown shown above and are ready to do the final for integrating visual regression tests into your monorepo - setting up the GitHub action to run visual tests on every new commit to your repository!
GitHub Action
Let's look at .github/workflows/vrt.yml. This file will instruct GitHub action runners to run our Visual Tests in monorepo in parallel by utilizing the Matrix jobs. If boiled down to one sentence, it will: install dependencies for each part of monorepo, run both web apps & execute lost-pixel on both of them(we will still need to define what pages we need to test, and we will do this straight up next).
Don't forget to add your:
LOST_PIXEL_API_KEYto GitHub repository secrets. You will see yourLOST_PIXEL_API_KEYin the onboarding UI inside the repository on the Lost Pixel Platform. You can also get a secret by visiting the workspace settings
on:
  push:
    branches:
      - main
  pull_request:
    branches:
      - main

jobs:
  lost_pixel:
    runs-on: ubuntu-latest
    strategy:
      matrix:
        config:
          - {
              package: "apps/web",
              name: "Lost Pixel for Web",
              command: "pnpm run dev",
            }
          - {
              package: "apps/docs",
              name: "Lost Pixel for Docs",
              command: "pnpm run dev",
            }
    steps:
      - name: Checkout
        uses: actions/checkout@v2

      - name: Setup Node
        uses: actions/setup-node@v3
        with:
          node-version: 16.x

      - name: Install pnpm
        uses: pnpm/action-setup@v2
        with:
          version: 7.17.1

      - name: Install dependencies
        run: pnpm install

      - name: Cache Build
        uses: actions/cache@v2
        with:
          path: |
            apps/web/.next
            apps/docs/.next
          key: ${{ runner.os }}-build-${{ github.sha }}
          restore-keys: |
            ${{ runner.os }}-build-${{ github.sha }}

      - name: Start App
        run: cd ${{ matrix.config.package }} && ${{ matrix.config.command }} &
        env:
          CI: true

      - name: ${{ matrix.config.name }}
        uses: lost-pixel/[email protected]
        env:
          LOST_PIXEL_API_KEY: ${{ secrets.LOST_PIXEL_API_KEY }}
          LOST_PIXEL_CONFIG_DIR: ${{ matrix.config.package }}
  finalize:
    needs: [lost_pixel]
    runs-on: ubuntu-latest

    steps:
      - name: Checkout
        uses: actions/checkout@v2

      - name: Lost Pixel Finalize
        uses: lost-pixel/[email protected]
        env:
          LOST_PIXEL_API_KEY: ${{ secrets.LOST_PIXEL_API_KEY }}
          LOST_PIXEL_CONFIG_DIR: apps/web
        with:
          FINALIZE: true
Lost Pixel config
The last step of the integration is to instruct Lost Pixel in each individual monorepo project what tests we are expecting to create lostpixel.config.ts with the following contents:
import { CustomProjectConfig } from "lost-pixel";

export const config: CustomProjectConfig = {
  pageShots: {
    pages: [
      { path: "/", name: "web-home" },
    ],
    baseUrl: "http://172.17.0.1:3000",
  },
  lostPixelProjectId: "your-web-project-id-from-lost-pixel-platform",
  apiKey: process.env.LOST_PIXEL_API_KEY,
};
In apps/docs create lostpixel.config.ts with the following contents:
import { CustomProjectConfig } from "lost-pixel";

export const config: CustomProjectConfig = {
  pageShots: {
    pages: [
      { path: "/", name: "docs-home" },
    ],
    baseUrl: "http://172.17.0.1:3000",
  },
  lostPixelProjectId: "your-docs-project-id-from-lost-pixel-platform",
  apiKey: process.env.LOST_PIXEL_API_KEY,
};
This will instruct Lost Pixel to test the base route of your applications running in GitHub action. Note that you need to paste the correct lostPixelProjectId from respective projects on the Lost Pixel Platform for this to function!
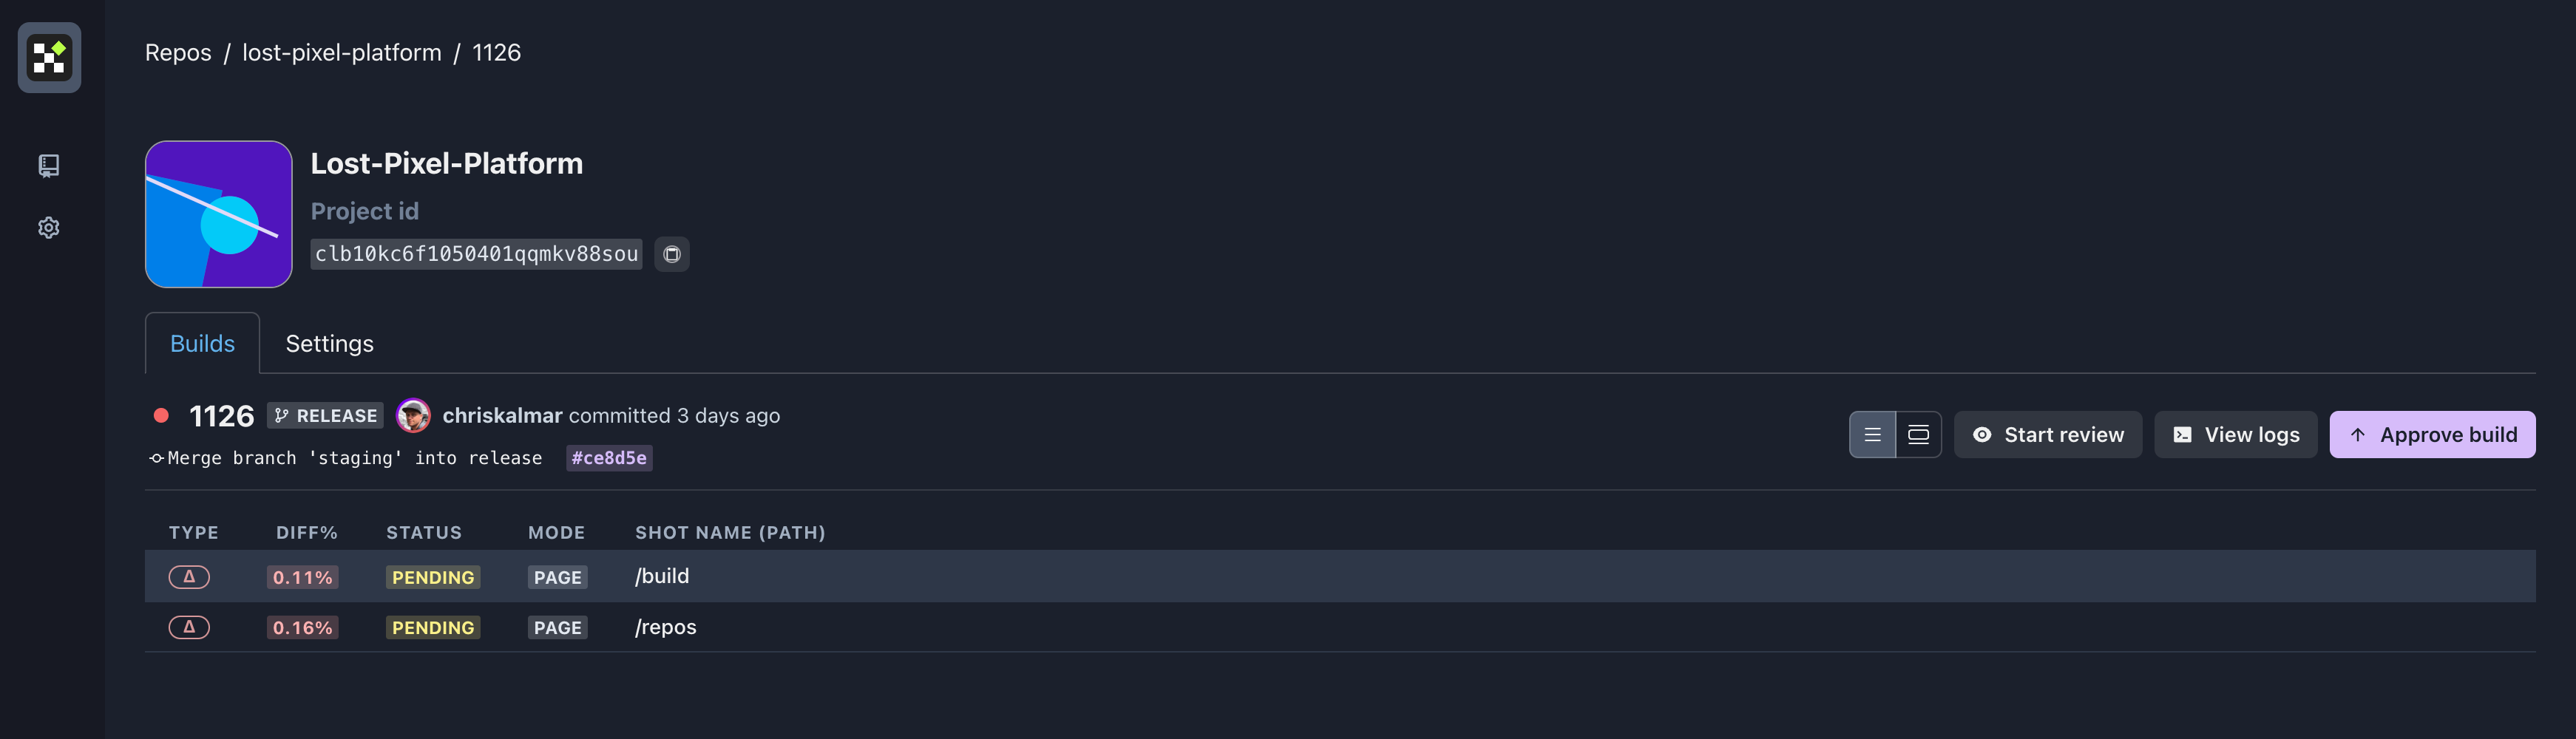
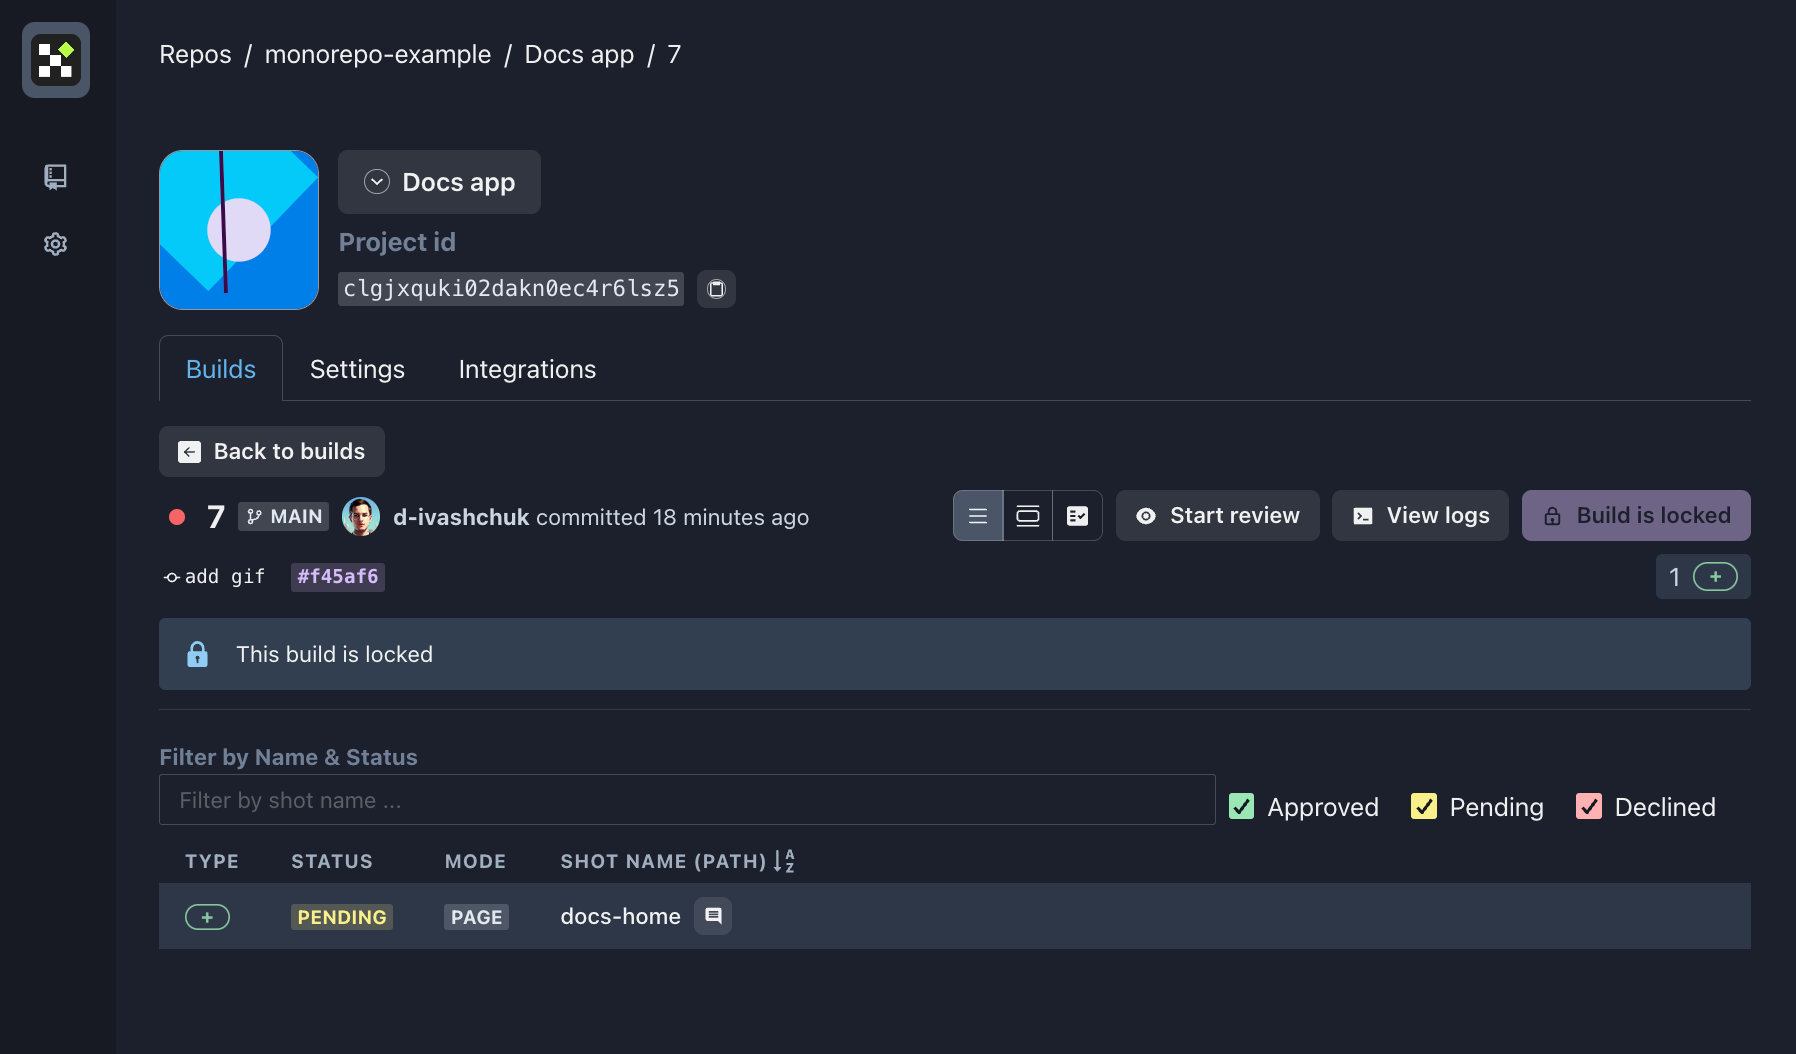
We aim at this as our result - our visual tests are on the platform now, and you can look at them by switching the projects in the tab!
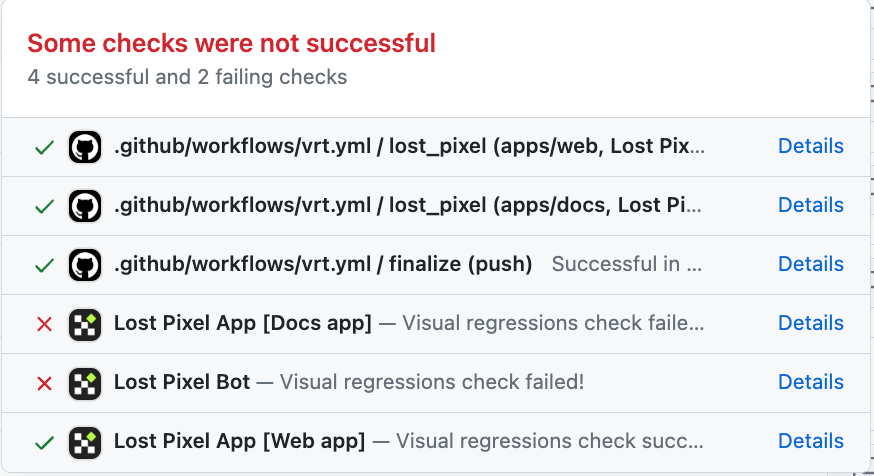
Furthermore, we have a full monorepo setup, and our commit status checks are indicating if our code has visual regressions:
Summary
We have implemented a Visual Regression Testing workflow for our turborepo, but it does not end here. You can extend your Lost Pixel runs with a holistic approach to visual regression testing by running visual tests not only on your pages but also on storybooks and E2E tests, you could also extend your mono repo with a Design System & set up Storybook component visual tests there still fitting it into your monorepos setup.
If you need help, I am always happy to chat on Visual Regression Testing discord!

About Dima Ivashchuk
Hey, I'm - Dima the co-founder of Lost Pixel. I like modern frontends, building stuff on the internet, and educating others. I am committed to building the best open-source visual regression testing platform!