Understanding Visual Regression Testing
As the world of coding continues to evolve, so must our testing strategies. As a result, a modern trend known as visual regression testing is gaining traction. Visual regression testing is essentially a spot the difference game for your app, ensuring that new updates haven't led to unwanted visual changes for your end-users.
Visual Regression Testing with Playwright
This guide will introduce you to a tool called Playwright for effective visual regression testing. Playwright can capture a screenshot of your website and then compare it with an older, approved version to detect any visual discrepancies.
Playwright is a free tool from Microsoft for visual regression testing of web apps. It can write scripts in various languages and run tests on different browsers, making it a versatile tool for modern web testing. In addition, playwright tests can run on Windows, Linux, and macOS, proving its adaptability across different platforms.
Imagine automated agents that understand your app's most critical user flows and can execute those flows without a hitch - filling inputs, clicking buttons, reacting to changes on the page, and much more. Playwright is a highly capable tool that makes writing such automation effortless.
Who might find this article useful
-
Software Developers: Especially front-end developers or full-stack developers tasked with maintaining the visual consistency of applications and websites.
-
Quality Assurance Engineers: Professionals responsible for testing software to ensure it's bug-free and visually consistent.
-
Product Managers: Those who need to understand the testing process and may be deciding on the tools and processes used in their teams.
-
DevOps Engineers: They are often responsible for setting up continuous integration (CI) environments that might run these visual regression tests.
-
UI/UX Designers: They might be interested in understanding how their designs are being tested for visual consistency.
This guide will go over each step in detail and is also suitable for beginners!
What This Guide Is About
This guide is a hands-on tutorial on using Playwright for visual regression testing in your continuous integration (CI) workflow. First, we'll dive into a real-world example to demonstrate how you can use Playwright to capture and compare screenshots of your web app, spotting any visual changes caused by updates to your code.
We'll also guide you on integrating these visual tests into your CI pipeline with GitHub Actions. This way, your tests run automatically every time you update your code, helping to maintain your app's visual consistency.
We will cover several approaches using the free native Playwright option and a cloud visual regression testing solution like Lost Pixel and compare their differences and use cases.
Setting up native Playwright visual regression testing
We are using the official Playwright example as the starter code
Install the dependencies:
npm install && npx playwright inst all
Run tests locally to see them passing:
npm run test
See the report of the Playwright execution:
npx playwright show-report
Let's add couple of visual tests to the Playwright execution:
test.describe("New Todo", () => {
  test("should allow me to add todo items", async ({ page }) => {
    // create a new todo locator
    const newTodo = page.getByPlaceholder("What needs to be done?");
    // Create 1st todo.
    await newTodo.fill(TODO_ITEMS[0]);
    await newTodo.press("Enter");

    // Make sure the list only has one todo item.
    await expect(page.getByTestId("todo-title")).toHaveText([TODO_ITEMS[0]]);

    // Create 2nd todo.
    await newTodo.fill(TODO_ITEMS[1]);
    await newTodo.press("Enter");

    // Make sure the list now has two todo items.
    await expect(page.getByTestId("todo-title")).toHaveText([
      TODO_ITEMS[0],
      TODO_ITEMS[1],
    ]);

    await checkNumberOfTodosInLocalStorage(page, 2);

    //  🚀🚀🚀 We are adding visual tests here 🚀🚀🚀
    await expect(page).toHaveScreenshot("new-todo.png");
  });
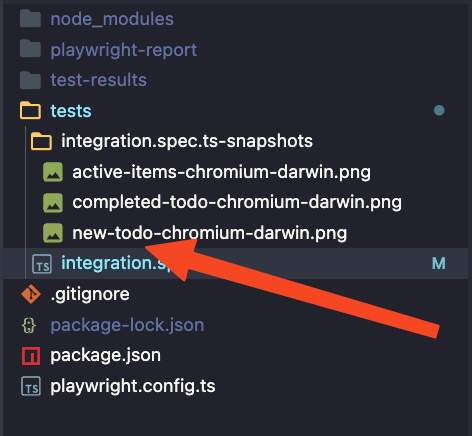
After running the tests(in this case, I've added a couple more) we should start seeing our snapshots appear in the file system
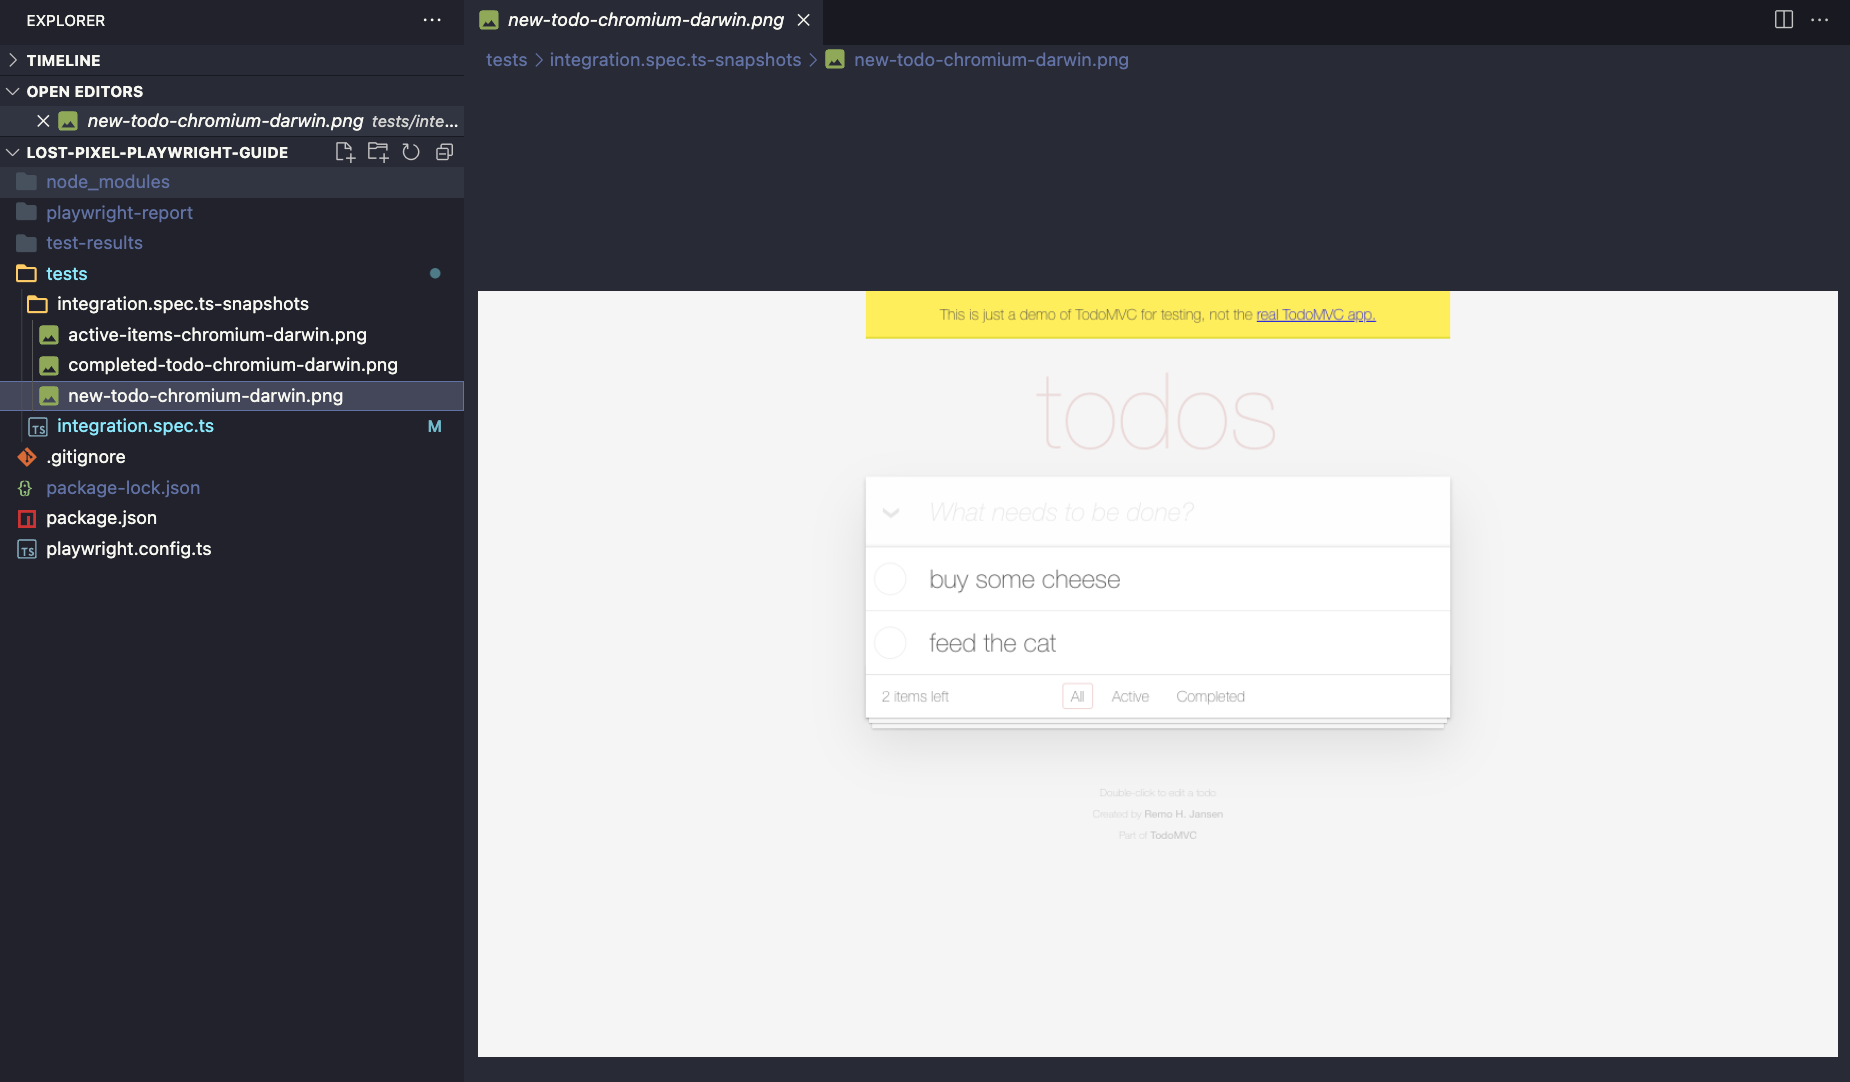
Moreover, we should see the actual images corresponding to our test cases.
Note how cool it is that we can make visual assertions numerous times in one test run, thus making sure that our application looks a certain way after meaningful user interactions
In visual testing, we always operate with the following concepts: baselines, differences, and regressions. You can read more about them in this glossary. Let's assume that we have changed our application and want to ensure that the baselines are up to date with our tests.
// Let's rename couple of the items in our TODO list
const TODO_ITEMS = [
  "buy some Cheddar cheese",
  "feed the dog",
  "book a doctors appointment",
];
After running the tests, we should see an excellent report from Playwright showing us that we've got something new, and we did not expect to see this.
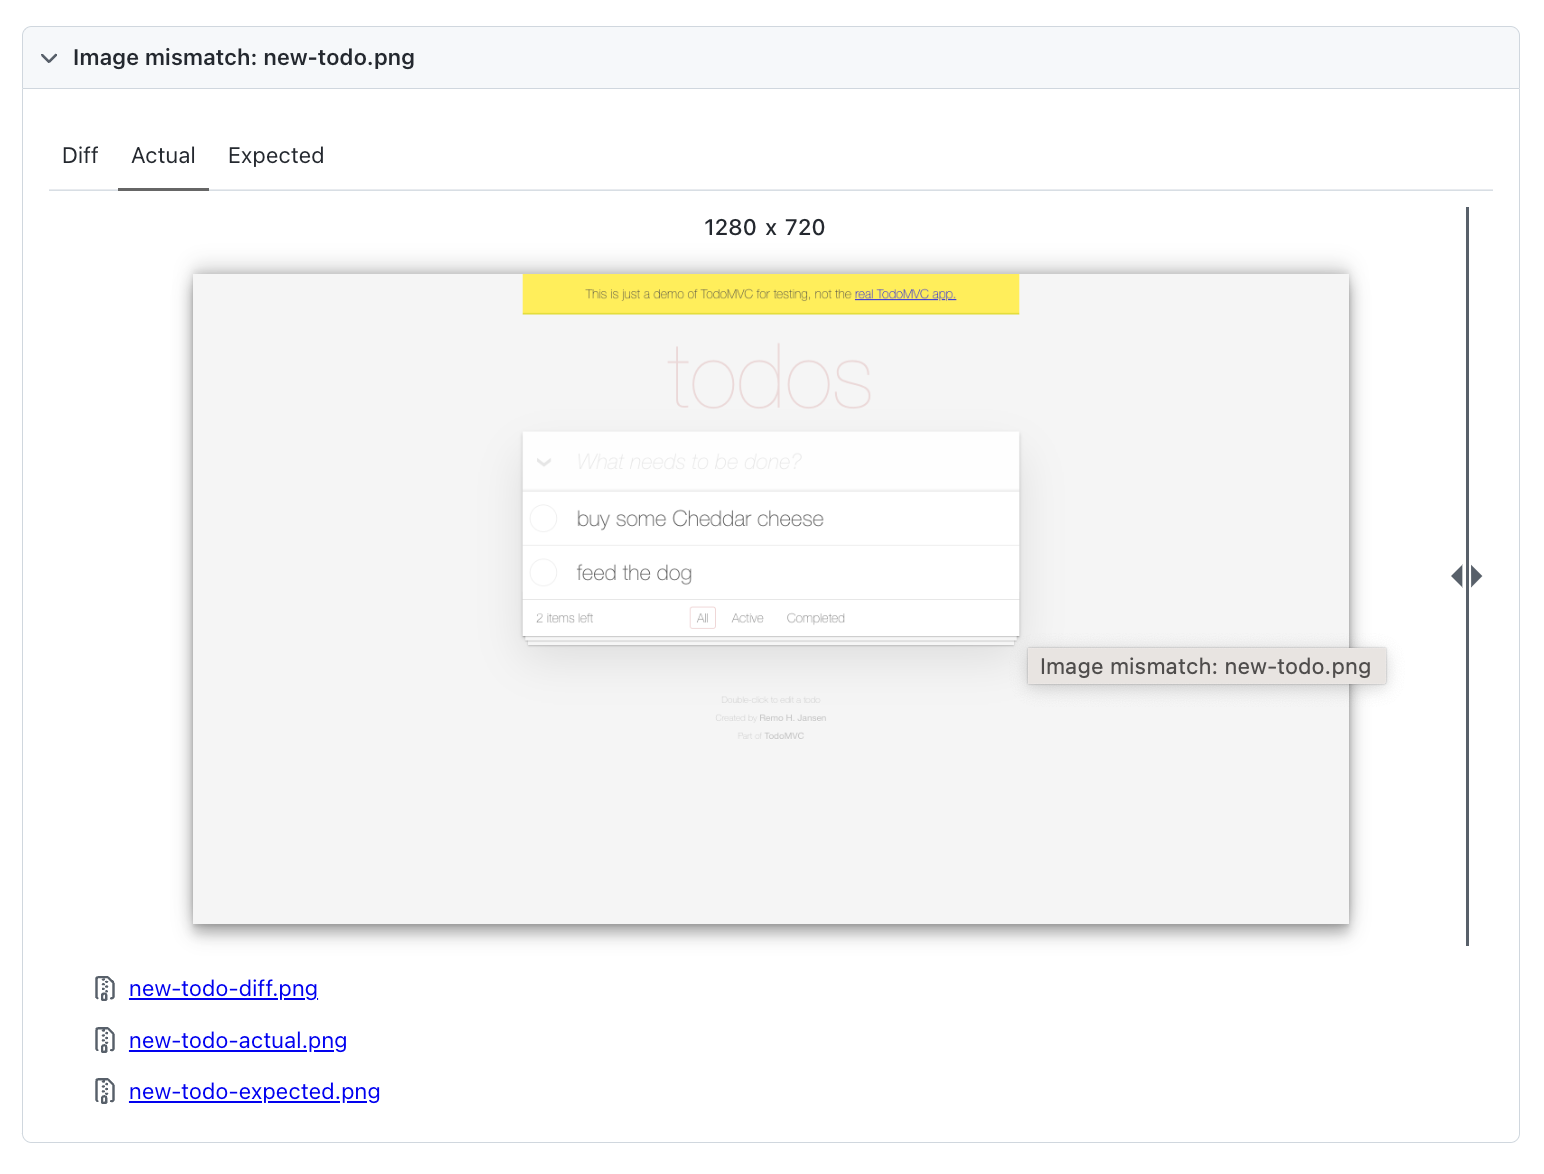
If this was a visual regression - we would need to fix our application code, in this case we made this change deliberately so we can run Playwright with the following params to update the screenshots:
npx playwright test --update-snapshots
This code will update our snapshots stored as local files and ensure that our tests pass this time!
GitHub Actions
Let's extend our setup to run the Playwright test suite on each and every commit. For this purpose let's create the following folders:
.github/workflows
Inside this folder, let's create vrt.yaml - where VRT is Visual Regression Testing, you can name it in anyhow; I just prefer this convention! The contents of the file should look like this:
name: Playwright Tests

on:
  push:
    branches: [main]
  pull_request:
    branches: [main]

jobs:
  test:
    timeout-minutes: 60
    runs-on: ubuntu-latest
    steps:
      # Checkout and setup
      - uses: actions/checkout@v2
      - uses: actions/setup-node@v2
        with:
          node-version: "14.x"
      - name: Install dependencies
        run: npm install
      - name: Install Playwright Browsers
        run: npx playwright install --with-deps chromium
      # Run Playwright tests
      - name: Run Playwright tests
        run: npx playwright test
      # Upload the test result artifacts
      - uses: actions/upload-artifact@v2
        if: failure()
        with:
          name: playwright-report
          path: playwright-report/
          retention-days: 30
      - uses: actions/upload-artifact@v2
        if: failure()
        with:
          name: tests
          path: tests/
          retention-days: 30
Note the artifacts upload step - on your first run, you will most probably miss the baselines for the images due to them being taken on a different OS(Linux defaults on GitHub). You can download the /tests artifacts folder and replace your local one with it - after pushing new baselines, the run should pass.
You could use this method to update the baselines whenever the changes are intended, or you can go with a more elaborate way of creating a new GitHub action that could partially automate this process for you. I will not be covering it in this guide as it requires more than beginner knowledge in how GitHub actions work
Congratulations you now have a fully functional visual regression testing CI/CD setup that you could use on your pages!
If you want a more production-ready automated setup with a big boost of developer experience, continue reading because we will also cover how to migrate this setup to Lost Pixel Platform(Visual Regression Testing cloud).
What is Lost Pixel Platform 🔎
Lost Pixel Platform is a cloud-based visual regression testing platform that enables developers to test and validate the visual appearance of web pages and applications. It automates the testing process, helping to ensure that the visual integrity of the application is maintained. The platform captures screenshots of web pages and compares them to previous versions, allowing developers to quickly identify and fix visual bugs. In addition, it offers straight integration with GitHub & allows for easy collaboration between team members.
Lost Pixel is free for open source & offers a generous free plan for small projects!

Setting up Lost Pixel
You can use the quickstart documentation from lost-pixel.com to set up the platform to work with your repositories via installing the official Lost Pixel GitHub app. In this guide, we will focus on setting up the right configuration, assuming you have done the platform setup already!
You can use Lost Pixel Onboarding to quickly set up the project by copying & pasting the respective files.
In our lostpixel.config.ts that we need to create at the root of our project, let's define the custom tests(how to use Lost Pixel with Playwright or similar tools). This will make Lost Pixel aware that screenshotting process is done on your side, and it only needs to take care of comparing images & offering them on the platform
import { CustomProjectConfig } from 'lost-pixel';

export const config: CustomProjectConfig = {
   customShots: {
    // 📒 currentShotsPath should be matching the one above from playwright test
    currentShotsPath: './lost-pixel',
  },
  lostPixelProjectId: 'clde9r3rh00v3m50vlq8y0k78',
  apiKey: process.env.LOST_PIXEL_API_KEY,
};
In our .github/workflows/vrt.yml at the root of our project let's define our CI/CD job with Lost Pixel. Note that you you need to use a LOST_PIXEL_API_KEY that you previosly set up on the Lost Pixel Platform.
name: Playwright Tests

on:
  push:
    branches: [main]
  pull_request:
    branches: [main]

jobs:
  test:
    timeout-minutes: 60
    runs-on: ubuntu-latest
    steps:
      # Checkout and setup
      - uses: actions/checkout@v2
      - uses: actions/setup-node@v2
        with:
          node-version: "14.x"
      - name: Install dependencies
        run: npm install
      - name: Install Playwright Browsers
        run: npx playwright install --with-deps chromium
      # Run Playwright tests
      - name: Run Playwright tests
        run: npx playwright test

      - name: Lost Pixel
        uses: lost-pixel/[email protected]
        env:
          LOST_PIXEL_API_KEY: ${{ secrets.LOST_PIXEL_API_KEY }}
Now let's replace our Playwright visual tests with just making screenshots:
Before:
await expect(page).toHaveScreenshot("new-todo.png")
After:
await page.screenshot({ path: 'lost-pixel/a.png', fullPage: true })
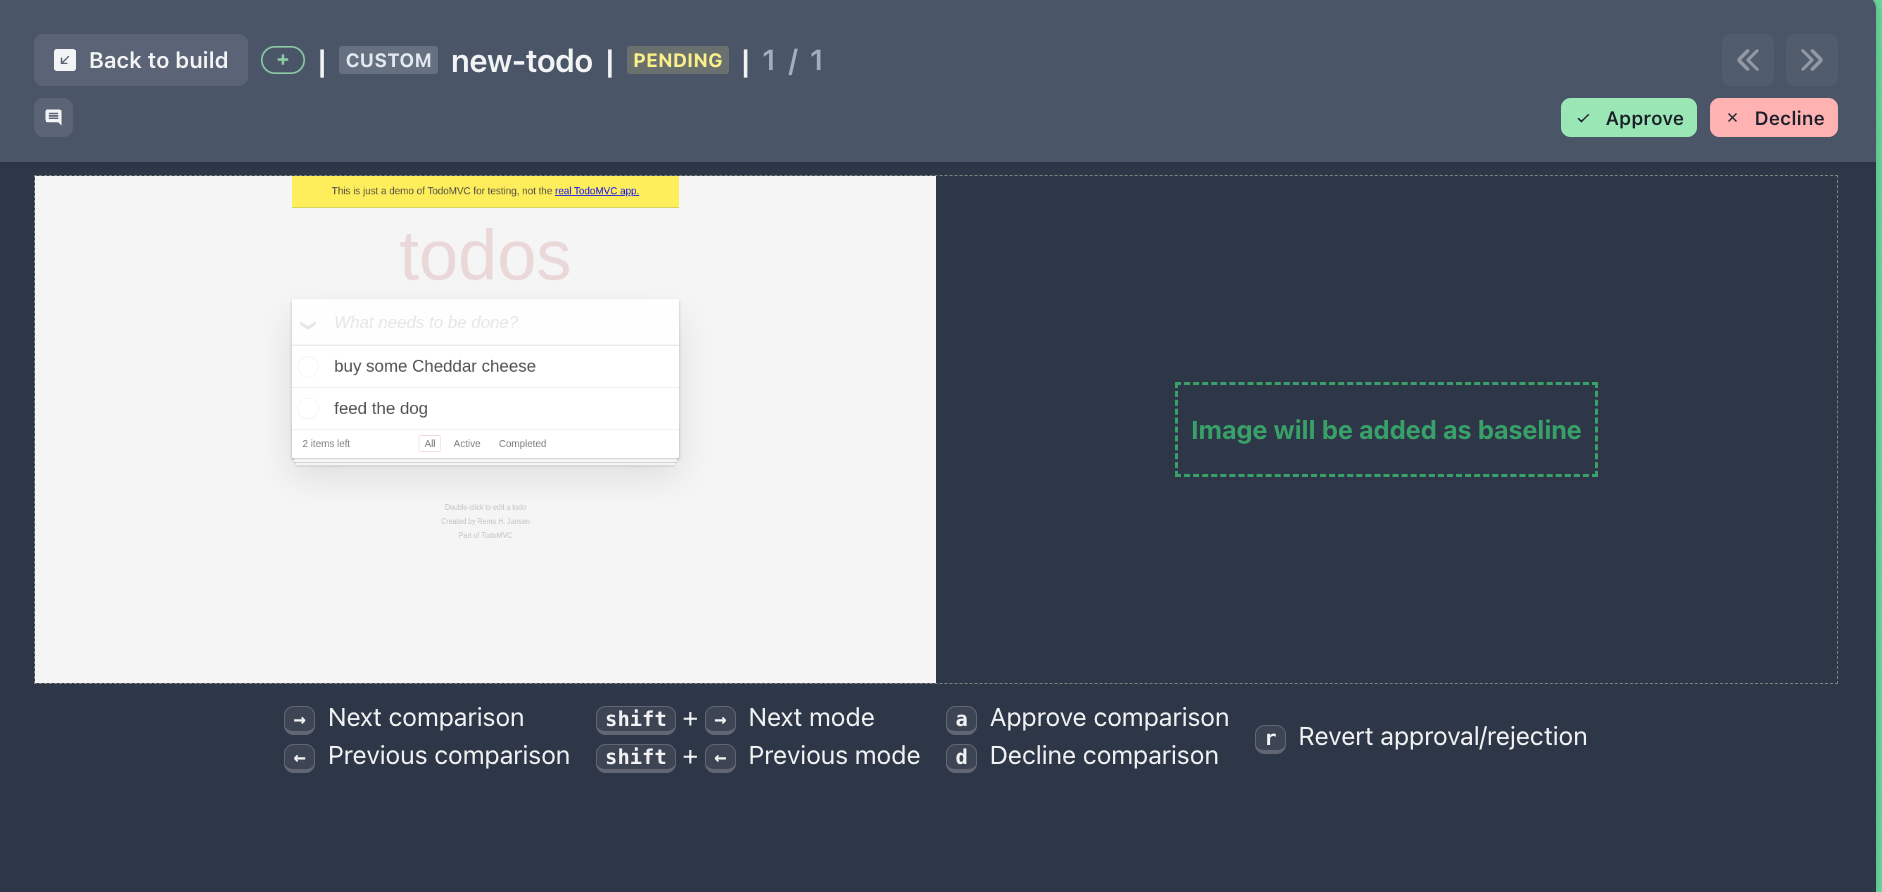
With this simple setup, we are done with visual regression tests on Lost Pixel Platform 🙌🏼 Our first shot is arleady on the Platform
Summary
We have gone through the main aspects of why Playwright is an excellent tool for doing visual regression testing and covered two ways of managing your tests - fully open-source and with a bit of manual work & using Lost Pixel Platform that offers a battle-tested visual regression testing workflow.
If you need help, I am always happy to chat on Visual Regression Testing Discord!

About Dima Ivashchuk
Hey, I'm - Dima the co-founder of Lost Pixel. I like modern frontends, building stuff on the internet, and educating others. I am committed to building the best open-source visual regression testing platform!